VirtualBox4.1のリンククローンをやってみた
普段は仕事でXenやXenServerやESXiやHyper-Vを使いますが、ちょっと試してみようとか思うときは VirtualBox が すごく便利です。そんなVirtualBoxも4.1になり、"リンククローン"も出来るようになり嬉しいことばかりです。
早速試してみたのですがリンククローンが見当たらない....。VirtualBoxのChangeLogをみると
Support for cloning of VMs (bug #5853, see the manual for more information): full clones can be created through the GUI and VBoxManage, linked clones only through VBoxManage
http://www.virtualbox.org/wiki/Changelog
「linked clones only through VBoxManage」コマンドラインの VBoxManage のみサポートのようです。ということで、コマンドラインでリンククローンをやってみました。
今回はWindowのVirtualBox4.1で試しています。最初はオプションを見ます。
http://www.virtualbox.org/manual/ch08.html#vboxmanage-clonevm
- snapshot
| : Select a specific snapshot where the clone operation should refer to. Default is referring to the current state. - mode machine|all: Selects the cloning mode of the operation. If machine is selected (the default), the current state of the VM without any snapshots is cloned. If all is the selected mode all snapshots and the current state are cloned.
- options link|keepallmacs|keepnatmacs|keepdisknames: Allows additional fine tuning of the clone operation. The first option defines that a linked clone should be created, which is only possible for a machine clone from a snapshot. The next two options allow to define how the MAC addresses of every virtual network card should be handled. They can either be reinitialized (the default), left unchanged (keepallmacs) or left unchanged when the network type is NAT (keepnatmacs). If you add keepdisknames all new disk images are called like the original once, otherwise they are renamed.
- name
: Select a new name for the new virtual machine. Default is "Original Name Clone". - basefolder
: Select the folder where the new virtual machine configuration should be saved in. - uuid
: Select the UUID the new VM should have. This id has to be unique in the VirtualBox instance this clone should be registered. Default is creating a new UUID. - register: Automatically register the new clone in this VirtualBox installation. If you manually want register the new VM later, see the section called “VBoxManage registervm / unregistervm” for instructions how to do so.
必須なのはこのぐらいかな。
- --snapshot
| はスナップショットのuuidか名前 - --options link がリンククローンオプション。
- --name
は 新しいクローン名
VBoxManageクローン元VMの情報をみます。
>VBoxManage showvminfo  ubuntu001
 Name:            ubuntu001
 Guest OS:        Ubuntu
 UUID:            a0f412ba-2843-40e0-a753-a69395a2fa2b
 Config file:     G:\VMImage\ubuntu001\ubuntu001.vbox
 Snapshot folder: G:\VMImage\ubuntu001\Snapshots
 Log folder:      G:\VMImage\ubuntu001\Logs
 Hardware UUID:   a0f412ba-2843-40e0-a753-a69395a2fa2b
シンタックスが分からないので適当に打ってみる
>VBoxManage clonevm ubuntu001 --options link --name ubuntu002
 VBoxManage.exe: error: Linked clone can only be created from a snapshot
 VBoxManage.exe: error: Details: code E_INVALIDARG (0x80070057), component Machine, interface IMachine, callee IUnknown
 Context: "CloneTo(trgMachine, mode, ComSafeArrayAsInParam(options), progress.asOutParam())" at line 444 of file VBoxManageMisc.cpp
「Linked clone can only be created from a snapshot」と怒られました。リンククローンをするにはスナップショットからクローンするっぽいです。素直にスナップショットを取得して、スナップショット名もしくはuuidを指定するといいみたい。ということはシンタックスはこんな感じですか。
>VBoxManage clonevm <VMの{uuid|name}> --snapshot <スナップショットの{uuid|name} --options link --name <新しい名前>
実行してみたら見事に成功!
>VBoxManage clonevm ubuntu001 --snapshot ubuntu-snapshot1 --options link --name ubuntu002
 0%...10%...20%...30%...40%...50%...60%...70%...80%...90%...100%
 Machine has been successfully cloned as "ubuntu002"
本当に一瞬でクローンが完了。でもレジストしないとVMは使えないので VBoxManage registervm してください。
>VBoxManage registervm G:\VMImage\ubuntu003\ubuntu002.vbox
こういうのはかなり楽しいですね。
Scientific Linux 6.0 で libvirtを野良ビルドしてVMware ESXiにアクセスしてみた。
Scientific Linux 6.0 で libvirtを使ってesxにアクセスして遊んでみようとしたのですが...
世の中は思うようにいかないです。
$ virsh -c esx://192.168.1.5/?no_verify=1
Enter username for 192.168.1.5 [root]:
Enter root's password for 192.168.1.5:
error: internal error Expecting VI API major/minor version '2.5' or '4.0' but found '4.1'
error: failed to connect to the hypervisor
少しlibvritが古いのか esx4.1 は受け付けないと怒られてしまいました。
$ rpm -aq | grep libvirt
libvirt-0.8.1-27.el6_0.6.x86_64
libvirt-client-0.8.1-27.el6_0.6.x86_64
公式サイトをみたところ「Since 0.8.3」からサポートのようです。
The libvirt VMware ESX driver can manage VMware ESX/ESXi 3.5/4.x and VMware GSX 2.0, also called VMware Server 2.0, and possibly later versions. Since 0.8.3 the driver can also connect to a VMware vCenter 2.5/4.x (VPX).
http://libvirt.org/drvesx.html
仕方が無いのでScientific Linux 6.1がリリースされるまで、でRHEL6.1のsrc.rpmを野良ビルドして我慢してみました。
libvirtのビルド
まずはrhel6.1のsrc.rpmをダウンロード。
$ wget ftp://ftp.nluug.nl/pub/os/Linux/distr/RedHat/ftp/redhat/linux/enterprise/6Server/en/os/SRPMS/libvirt-0.8.7-18.el6.src.rpm
このぐらいで大丈夫だろう、と前もって入れておいたのですが...
$ sudo yum install rpm-build gcc gdb make
かなり怒られました。
$ rpmbuild --rebuild libvirt-0.8.7-18.el6.src.rpm
Installing libvirt-0.8.7-18.el6.src.rpm
warning: user mockbuild does not exist - using root
warning: group mockbuild does not exist - using root
error: Failed build dependencies:
        python-devel is needed by libvirt-0.8.7-18.el6.x86_64
        autoconf is needed by libvirt-0.8.7-18.el6.x86_64
        automake is needed by libvirt-0.8.7-18.el6.x86_64
        libtool is needed by libvirt-0.8.7-18.el6.x86_64
        libxml2-devel is needed by libvirt-0.8.7-18.el6.x86_64
        xhtml1-dtds is needed by libvirt-0.8.7-18.el6.x86_64
        readline-devel is needed by libvirt-0.8.7-18.el6.x86_64
        ncurses-devel is needed by libvirt-0.8.7-18.el6.x86_64
        gettext is needed by libvirt-0.8.7-18.el6.x86_64
        gnutls-devel is needed by libvirt-0.8.7-18.el6.x86_64
        augeas is needed by libvirt-0.8.7-18.el6.x86_64
        libudev-devel >= 145 is needed by libvirt-0.8.7-18.el6.x86_64
        libpciaccess-devel >= 0.10.9 is needed by libvirt-0.8.7-18.el6.x86_64
        yajl-devel is needed by libvirt-0.8.7-18.el6.x86_64
        libpcap-devel is needed by libvirt-0.8.7-18.el6.x86_64
        libnl-devel is needed by libvirt-0.8.7-18.el6.x86_64
        avahi-devel is needed by libvirt-0.8.7-18.el6.x86_64
        libselinux-devel is needed by libvirt-0.8.7-18.el6.x86_64
        radvd is needed by libvirt-0.8.7-18.el6.x86_64
        cyrus-sasl-devel is needed by libvirt-0.8.7-18.el6.x86_64
        parted-devel is needed by libvirt-0.8.7-18.el6.x86_64
        device-mapper-devel is needed by libvirt-0.8.7-18.el6.x86_64
        numactl-devel is needed by libvirt-0.8.7-18.el6.x86_64
        libcap-ng-devel >= 0.5.0 is needed by libvirt-0.8.7-18.el6.x86_64
        netcf-devel >= 0.1.4 is needed by libvirt-0.8.7-18.el6.x86_64
        libcurl-devel is needed by libvirt-0.8.7-18.el6.x86_64
        audit-libs-devel is needed by libvirt-0.8.7-18.el6.x86_64
        systemtap-sdt-devel is needed by libvirt-0.8.7-18.el6.x86_64
足りないものは潰す。
$ sudo yum install python-devel autoconf automake libtool libxml2-devel xhtml1-dtds readline-devel ncurses-devel gettext gnutls-devel augeas libudev-devel libpciaccess-devel yajl-devel libpcap-devel libnl-devel avahi-devel libselinux-devel radvd cyrus-sasl-devel parted-devel device-mapper-devel numactl-devel libcap-ng-devel netcf-devel libcurl-devel audit-libs-devel systemtap-sdt-devel gnutls-utils
もう一度rpmbuildして完成。
$ rpmbuild --rebuild libvirt-0.8.7-18.el6.src.rpm

so.2()(64bit) libxslt.so.1()(64bit) libyajl.so.1()(64bit) libz.so.1()(64bit) python(abi) = 2.6 rtld(GNU_HASH)
Checking for unpackaged file(s): /usr/lib/rpm/check-files /home/foo/rpmbuild/BUILDROOT/libvirt-0.8.7-18.el6.x86_64
Wrote: /home/foo/rpmbuild/RPMS/x86_64/libvirt-0.8.7-18.el6.x86_64.rpm
Wrote: /home/foo/rpmbuild/RPMS/x86_64/libvirt-client-0.8.7-18.el6.x86_64.rpm
Wrote: /home/foo/rpmbuild/RPMS/x86_64/libvirt-devel-0.8.7-18.el6.x86_64.rpm
Wrote: /home/foo/rpmbuild/RPMS/x86_64/libvirt-python-0.8.7-18.el6.x86_64.rpm
Executing(%clean): /bin/sh -e /var/tmp/rpm-tmp.VinqCn
+ umask 022
+ cd /home/foo/rpmbuild/BUILD
+ cd libvirt-0.8.7
+ rm -fr /home/foo/rpmbuild/BUILDROOT/libvirt-0.8.7-18.el6.x86_64
+ exit 0
Executing(--clean): /bin/sh -e /var/tmp/rpm-tmp.uE2shc
+ umask 022
+ cd /home/foo/rpmbuild/BUILD
+ rm -rf libvirt-0.8.7
+ exit 0
野良ビルドしたlibvirtをインストール
$ sudo rpm -Uvh *rpm
Preparing...                ########################################### [100%]
   1:libvirt-client         ########################################### [ 25%]
   2:libvirt                ########################################### [ 50%]
   3:libvirt-python         ########################################### [ 75%]
   4:libvirt-devel          ########################################### [100%]
念のため再起動
$ sudo /etc/init.d/libvirtd restart
Stopping libvirtd daemon:                                  [  OK  ]
Starting libvirtd daemon:                                  [  OK  ]
libvirtでesxにアクセス
$ virsh -c esx://192.168.1.5/?no_verify=1
Enter username for 192.168.1.5 [root]:
Enter root's password for 192.168.1.5:
Welcome to virsh, the virtualization interactive terminal.

Type:  'help' for help with commands
       'quit' to quit
ゲスト一覧
virsh # list
 Id Name                 State
----------------------------------
 16 windows2000          running
 32 ubuntu11.04          running
208 centos5              running
224 cern6                running
esxの構成情報
virsh # nodeinfo
CPU model:           Intel Core i5 CPU M 460 @ 2.53G
CPU(s):              2
CPU frequency:       2526 MHz
CPU socket(s):       1
Core(s) per socket:  2
Thread(s) per core:  2
NUMA cell(s):        1
Memory size:         5954024 kB
ゲストのシャットダウン
virsh # shutdown 32
Domain 32 is being shutdown

virsh # list
 Id Name                 State
----------------------------------
 16 windows2000          running
208 centos5              running
224 cern6                running
ゲストOSの情報
virsh # dominfo 208
Id:             208
Name:           centos5
UUID:           564dc12a-363f-d01f-2863-606774e120fa
OS Type:        hvm
State:          running
CPU(s):         2
Max memory:     1048576 kB
Used memory:    1048576 kB
Persistent:     yes
まったくもって素晴らしい。野良ビルドって本当にいいですね。
しかし、まだまだESXサポートしているAPIは少ないのが現状っぽいですね。
http://libvirt.org/hvsupport.html
virsh # dommemstat 16
error: Failed to get memory statistics for domain 16
error: this function is not supported by the connection driver: virDomainMemoryStats
XenserverのAPIをrubyで叩く xenapi.rb も便利だった
これの続きです。xenap.rbをrequireして、あとはxenserverのapiのdocumentをみればすんなりいけるよね。
ディスクの使用状況を取得するサンプル。
require 'xenapi'

class Net::HTTP
  alias_method :old_initialize, :initialize
  def initialize(*args)
    old_initialize(*args)
    @ssl_context = OpenSSL::SSL::SSLContext.new
    @ssl_context.verify_mode = OpenSSL::SSL::VERIFY_NONE
  end
end

# first create a connection and login
session = XenAPI::Session.new('https://xenserver.host.com')

begin
  session.login_with_password('root', 'password')

  srs = session.SR.get_all
  srs.each {|sr|
    record = session.SR.get_record(sr)
    if record["type"] == "lvm"
      label = record["name_label"]
      physical = record["physical_size"].to_i / ( 1024*1024*1024)
      used = record["physical_utilisation"].to_i / ( 1024*1024*1024)
      virtual  = record["virtual_allocation"].to_i / ( 1024*1024*1024)
      usage =(used * 100) / physical

      puts "name label: #{label}"
      puts "size: #{usage}%(#{used} GB used)"
      puts "usage: #{physical} GB"
      puts "virtual allocation: #{virtual} GB"
    end
  }
ensure
  session.logout
end
こんな感じで。
$ ruby foo.rb
name label: Local storage
size: 56%(1584 GB used)
usage: 2786 GB
virtual allocation: 996 GB
XenServerのコマンドラインインターフェイス xe-cli の便利を実感してみた
XenServer使っていますか?私はVMwareよりXenServerの方が気に入っています。気に入っているその理由の1つとして、VMwareのSDKは認証が重くて*1時折寝てしまうことがありますが、XenServerのSDKは軽いです。機能は少ないですがやっぱり軽快なのは嬉しいです。
SDK
http://community.citrix.com/display/xs/Download+SDKs
- XenServer.NET: The XenServer SDK for C#.NET
- XenServer.NET: Old-style XenServer SDK for C#.NET
- XenServerJava: The XenServer SDK for Java
- libxenserver: The XenServer SDK for C
- XenServerPSSnapIn: The XenServer SDK for PowerShell
- XenAPI.py: The XenServer Python module
XML-RPCを叩けばいいってことなので、rubyで実装している人もいます。
- XenAPI.rb (http://dev.holgerjust.de/projects/xenapi-rb/wiki)
ここではお手軽な xe-cli を使ったサンプルをメモします。(XenServer5.6fp1で試しています)
xe-cliをインストール
XenServerにログインすればxe-cliは使えます。でもリモートで管理するのなら xe-cli を別のサーバにインストールしたほうが便利です。XenServer-5.6.1-fp1-linux-cd.iso の 中に xe-cli-5.6.100-39153p.i686.rpm があるのでインストールします。
$ sudo rpm -ivh xe-cli-5.6.100-39153p.i686.rpm
xs-tools
VMにxs-toolsはインストールしておきましょう。インストールしていないと取得できない場合があります。
パスワードファイルを作成
cliを実行中にpsでパスワードが生でみえてしまうので、パスワードファイルを作成します。1行目ユーザ、2行目パスワードです。
$ cat passwordfile.txt
user
password
VMの一覧を表示
$ xe -s <xenserver> -pwf ./<passwordfile.txt> vm-list | grep -v "^$"
uuid ( RO)           : 6136b9a8-c32a-b361-14eb-fc33337b2387
     name-label ( RW): Centos5
    power-state ( RO): running
uuid ( RO)           : e918bb8c-16eb-78ed-4aad-2a5f7f8e7d10
     name-label ( RW): WindowsXP
    power-state ( RO): running
uuid ( RO)           : 4ee28767-7423-4ee0-9cc8-8420c45c55cd
     name-label ( RW): Control domain on host: epitaph
    power-state ( RO): running
uuid ( RO)           : fb9f1fe1-ec48-bf32-0f03-9621a61f01b7
     name-label ( RW): Windows2003
    power-state ( RO): halted
uuid ( RO)           : 55c19dd9-cb27-129a-be8e-723a5d72b830
     name-label ( RW): Centos5-1
    power-state ( RO): halted
VMをリブート
$ xe -s <xenserver> -pwf ./<passwordfile.txt> vm-reboot uuid=<uuid>
VMのネットワーク情報
VMに割り当てられているIPアドレスを取得できます。
$ xe -s <xenserver> -pwf ./<passwordfile.txt> vm-param-get param-name=networks uuid=<uuid>
0/ip: 192.168.1.101
VMのスナップショット取得
成功するとスナップショットのuuidが返ってきます。
$xe -s <xenserver> -pwf ./<passwordfile.txt> vm-snapshot new-name-label="snapshot-001" uuid=<uuid>
bbe3a3be-5ace-462d-9005-ba1bbc226e1d
VMのOSの情報
$ xe -s <xenserver> -pwf ./<passwordfile.txt> vm-param-get param-name=os-version uuid=<uuid>
name: CentOS release 5.5 (Final); uname: 2.6.18-194.3.1.el5.centos.plusxen; distro: centos; major: 5; minor: 5
VMのvCPUの使用率
vCPU数が複数であればcpu-id単位で使用率が表示されます。
$ xe -s <xenserver> -pwf ./<passwordfile.txt> vm-param-get param-name=VCPUs-utilisation uuid=<uuid>
0: 0.002; 1: 0.000
VMの色々な情報取得
$ xe -s <xenserver> -pwf ./<passwordfile.txt> vm-param-list uuid=<uuid>
VMのメモリ情報
vm-param-listの情報にはメモリの使用量が存在しない。色々調べたところcitrixのフォーラムにありました。まず vm-data-source-list で情報をみます。name_label は memory と memory_internal_freeです。どちらもenable: true になっていることを確認。falseの場合はxs-toolsをインストールしていない可能性が高いです。
$ xe -s <xenserver> -pwf ./<passwordfile.txt> vm-data-source-list uuid=<uuid>
name_label          : memory
    name_description: Memory currently allocated to VM
             enabled: true
            standard: true
                 min: 0.000
                 max: nan
               units:


name_label          : memory_internal_free
    name_description: Memory used as reported by the guest agent
             enabled: true
            standard: true
                 min: 0.000
                 max: nan
               units:
メモリの総割り当てサイズ (byte)。メモリの総割り当てサイズはバイト(byte)、メモリの使用量はキロバイト(kbyte)で返ってくるので注意が必要。
$ xe -s <xenserver> -pwf ./<passwordfile.txt> vm-data-source-query data-source=memory uuid=<uuid>
419430400.000000
メモリの使用量 (kbyte)。
$ xe -s <xenserver> -pwf ./<passwordfile.txt> vm-data-source-query data-source=memory_internal_free uuid=<uuid>
124456.000000
VMのネットワークトラフィック
メモリと同じく vm-data-source-list で情報をみます。name_label は vif_0_tx と vif_0_tx 。descriptionに「virtual interface number '0'」とあるように最初の'0'のVirtual NICです。et1 なら vif_1_tx と vif_1_txになります。
xe -s <xenserver> -pwf ./<passwordfile.txt> vm-data-source-list uuid=<uuid>
name_label          : vif_0_tx
    name_description: Bytes per second transmitted on virtual interface number '0'
             enabled: true
            standard: true
                 min: 0.000
                 max: nan
               units:


name_label          : vif_0_rx
    name_description: Bytes per second received on virtual interface number '0'
             enabled: true
            standard: true
                 min: 0.000
                 max: nan
               units:
送信サイズ(byte)
$ xe -s <xenserver> -pwf ./<passwordfile.txt> vm-data-source-query data-source=vif_0_tx uuid=<uuid>
15.835249
受信サイズ(byte)
$ xe -s <xenserver> -pwf ./<passwordfile.txt> vm-data-source-query data-source=vif_0_rx uuid=<uuid>
15.835249
VMの操作系
VMをshutdown/rebootしても黄色いアイコンのまま停止してくれない場合の強制適用の方法。
対象のVMのuuidを調べ、list_domainsでid調べ(Hが付く)、xenops destroy_domainで殺すという感じです。
$ xe vm-list
$ list_domains | grep <uuid>
<id> | <uuid> | H
$ /opt/xensource/debug/xenops destroy_domain –domid <id>
参考
- http://v12n.jp/index.php?%A5%B5%A1%BC%A5%D0%A1%BC%B2%BE%C1%DB%B2%BD%2FCitrix%20XenServer#content_1_144
- http://peta.okechan.net/blog/archives/739
- http://docs.vmd.citrix.com/XenServer/5.6.0fp1/1.0/en_gb/
- http://docs.vmd.citrix.com/XenServer/5.6.0fp1/1.0/en_gb/reference.html
- http://support.citrix.com/article/CTX131421
*1:これは嘘でした。
VMware の自己満足TIPS
ちょっとだけ自分が自己満足になれた、小さいTIPSの備忘録です。
vSphere Clientで自動ログイン
vSphere Client の exe である VpxClient.exe を オプション付きで起動すればOK。もちろんショートカットに設定して自己満足に浸るもよし。
VpxClient.exe --server <server> --user <username> --password <password>
vSphere Client を 英語版で起動してみる。
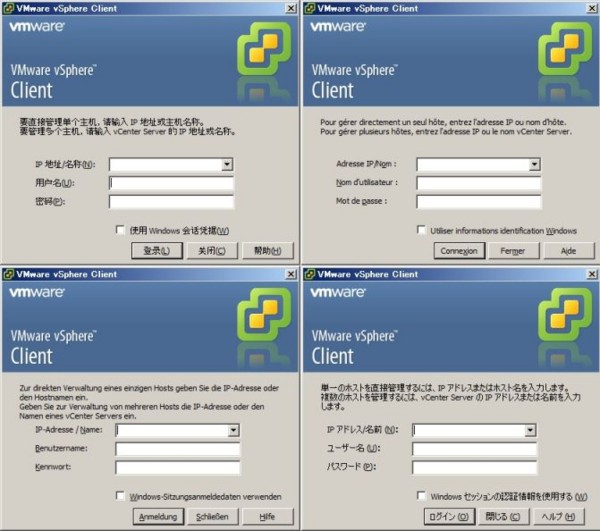
英語(en)、フランス語(fr)、ドイツ語(de)、日本語(ja)、中国語(zh-CN) などで起動できます。VpxClient.exe 直下に リソースがあります。色々起動して楽しめるけど、私は英語もロクにできないので悲しい自己満足でしかない。本当に悲しい。
VpxClient.exe --locale <{ en | fr | de | ja | zh-CN }>
esxi にログインして vim-cmd で CLI
VMwareの CLI は複数あって非常にわかりにくいです。(VMware 自動化ツールおよびSDK)
上記CLIはダウンロードしてインストールしないと使えませんが、esxiにログインして中のvim-cmd という CLI を直接実行するという方法があります。
ゲストOS一覧を表示
~ # vim-cmd vmsvc/getallvms
Vmid            Name                                         File                                     Guest OS          Version   Annotation
128    activedirectory           [datastore1] activedirectory/activedirectory.vmx               win2000ServGuest        vmx-07
160    freenas                   [datastore1] freenas/freenas.vmx                               freebsd64Guest          vmx-07
256    scientific6_x64           [datastore1] scientific6_x64/scientific6_x64.vmx               rhel6_64Guest           vmx-07
288    ubuntu11.04               [datastore1] ubuntu11.04/ubuntu11.04.vmx                       ubuntu64Guest           vmx-07
VMが起動しているか確認して、Power-Offしてみる
~ # vim-cmd vmsvc/power.getstate 288
Retrieved runtime info
Powered on
~ # vim-cmd vmsvc/power.off 288
Powering off VM:
リモートサーバのesxi上で稼働しているVMのスナップショットをとる
~ # vim-cmd vmsvc/snapshot.create
Insufficient arguments.
Usage: snapshot.create vmid [snapshotName] [snapshotDescription] [includeMemory] [quiesced]
~ #  vim-cmd -H <server> -U <username>-P <password> vmsvc/snapshot.create 288 `date +%Y%m%d`
Create Snapshot:
~ #  vim-cmd -H <server> -U <username>-P <password> vmsvc/snapshot.get 288
 Get Snapshot:
 |-ROOT
 --Snapshot Name        : 20110507
 --Snapshot Desciption  :
 --Snapshot Created On  : 5/7/2011 8:40:7
 --Snapshot State       : powered off
vSphere ClientのコンソールのかわりにVNCで接続する
重いコンソールはこりごり。VNCで接続したいよね、という時に便利です。esxi経由で接続するのでネットワークの切断もできたりします。
- 最初に対象のゲストVMをPower-Offしておきます。
- esxiにsshでログインして、対象のゲストの.vmxファイルにVNCで接続できるように修正します。*1
- .vmxをリロード (vim-cmd vmsvc/getallvmsしてVmidを調べてください)
- TightVNCやUltraVNCなどで接続してください。
RemoteDisplay.vnc.enabled = "True"
RemoteDisplay.vnc.port = "5901"
RemoteDisplay.vnc.password = "password"
~ # vim-cmd vmsvc/reload <Vmid>

vSphere Client RDP Plug-in というものもある
Xtravirt という会社が RDPでVMに接続を簡単にしてくれる プラグインがあったります。
パフォーマンスカウンタ
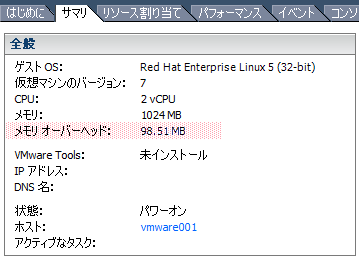
ときおり、シニアエンジニアの方でオーバーヘッドを考慮しない人がいるので、理解してくれると信じて「ここ!」と指をさしてみます。もちろんメモリバルーニングやメモリ圧縮は説明せず、メモリオーバーヘッドだけ説明するのが私の器の大きさです。

VMwareパフォーマンスカウンタの日本語表記と英語表記を比較するときは、vSphere Client をインストールしたディレクトリを調べれば カタログファイルがあるので便利、かもしれない。
 %ProgramFiles%\VMware\Infrastructure\Virtual Infrastructure Client\4.1\Catalogs\Default\vim\ja\perf.vmsg (日本語のパフォーマンスカウンタ)
 %ProgramFiles%\VMware\Infrastructure\Virtual Infrastructure Client\4.1\Catalogs\Default\vim\en\perf.vmsg (英語のパフォーマンスカウンタ)
snmpの設定
取れる情報は少ないけど必要であれば設定しておくのがいいと思います。esxiにログインしてファイルを編集してください。
~ # cp -p /etc/vmware/snmp.xml /etc/vmware/snmp.xml.backup
~ # sed -i -e "s/false/true/g" -e 's/\<communities./\0public/' /etc/vmware/snmp.xml
~ # cat /etc/vmware/snmp.xml
 /<config><snmpSettings><enable>true</enable><communities>public</communities><targets></targets></snmpSettings></config>
~ # /sbin/services.sh restart
esxi の oem.tgzをいじったりするとき
oem.tgzだけじゃないけど、VMwareのCoolなバッドノウハウが転がっているので、お世話になっています。
Virtualbox でiSCSIを使ってみた
Virtualbox4リリースしましたね。使ってみましたがかなりいい感じです。さらに快適にするためにiSCSIターゲットに接続して仮想マシンライフを楽しんでみたいと思います。
インストール
ライセンス変更がありGPL2オンリーになったそうなので、機能拡張が別になっています。
http://journal.mycom.co.jp/news/2010/12/24/043/
- まずVirtualbox4の本体をダウンロードしてインストールします。
- Oracle VM VirtualBox Extension Pack もダウンロードしてインストールしましょう。この機能拡張をインストールしないとリモートディスプレイやiSCSIイニシエーターが使えません。
iSCSIの設定
まずiSCSIターゲットのiqnとlunを調べておきます。私のはUbuntu10.10でIETでiSCSIターゲットを構築しています。
$ cat /proc/net/iet/volume
tid:1 name:iqn.2010-07.dharry.local.caravan:92a5734bd2fa81041d85165e5855880d
        lun:1 state:0 iotype:fileio iomode:wt blocks:41943040 blocksize:512 path:/dev/caravan/iscsi001
        lun:2 state:0 iotype:fileio iomode:wt blocks:83886080 blocksize:512 path:/dev/caravan/iscsi002
先ほど新規で作成した仮想マシンの情報を表示させて追加したSCSIコントローラの名前を調べます。
$ VBoxManage showvminfo <仮想マシン名>
Storage Controller Name (2):            SCSI コントローラ
VBoxManageコマンドでiSCSIのディスクを追加します。
$ VBoxManage storageattach  ubuntu-iscsi --storagectl "SCSI コントローラ" --port 0 --device 0 --type hdd --medium iscsi --server 192.168.1.250 --target iqn.2010-07.dharry.local.caravan:92a5734bd2fa81041d85165e5855880d  --lun 1
iSCSI disk created. UUID: 028e7b05-829b-4bbd-8b29-02a8a55b62a2
すんなり追加できました。
VMware vCenter Converter Standalone 4.3 では Windows2000, WidnowsNT はP2Vコンバート対象外だってさ
VMware vCenter Converter Standalone 4.3 Release Notes をみると、Windows2000, WindowsNT のP2Vコンバートのサポートしなくなったぽい。あとLinuxにvCenter Converter 4.3 のインストールバイナリは提供しなくなった。どんどん絞っていきますね。
http://www.vmware.com/support/converter/doc/conv_sa_43_rel_notes.html#whatsnew
Discontinued Support
Support of the following operating systems is discontinued:
Windows 2000
Windows NT
Support for OVF format is discontinued
Support for VCB image sources is discontinued
Linux installation support is discontinued


